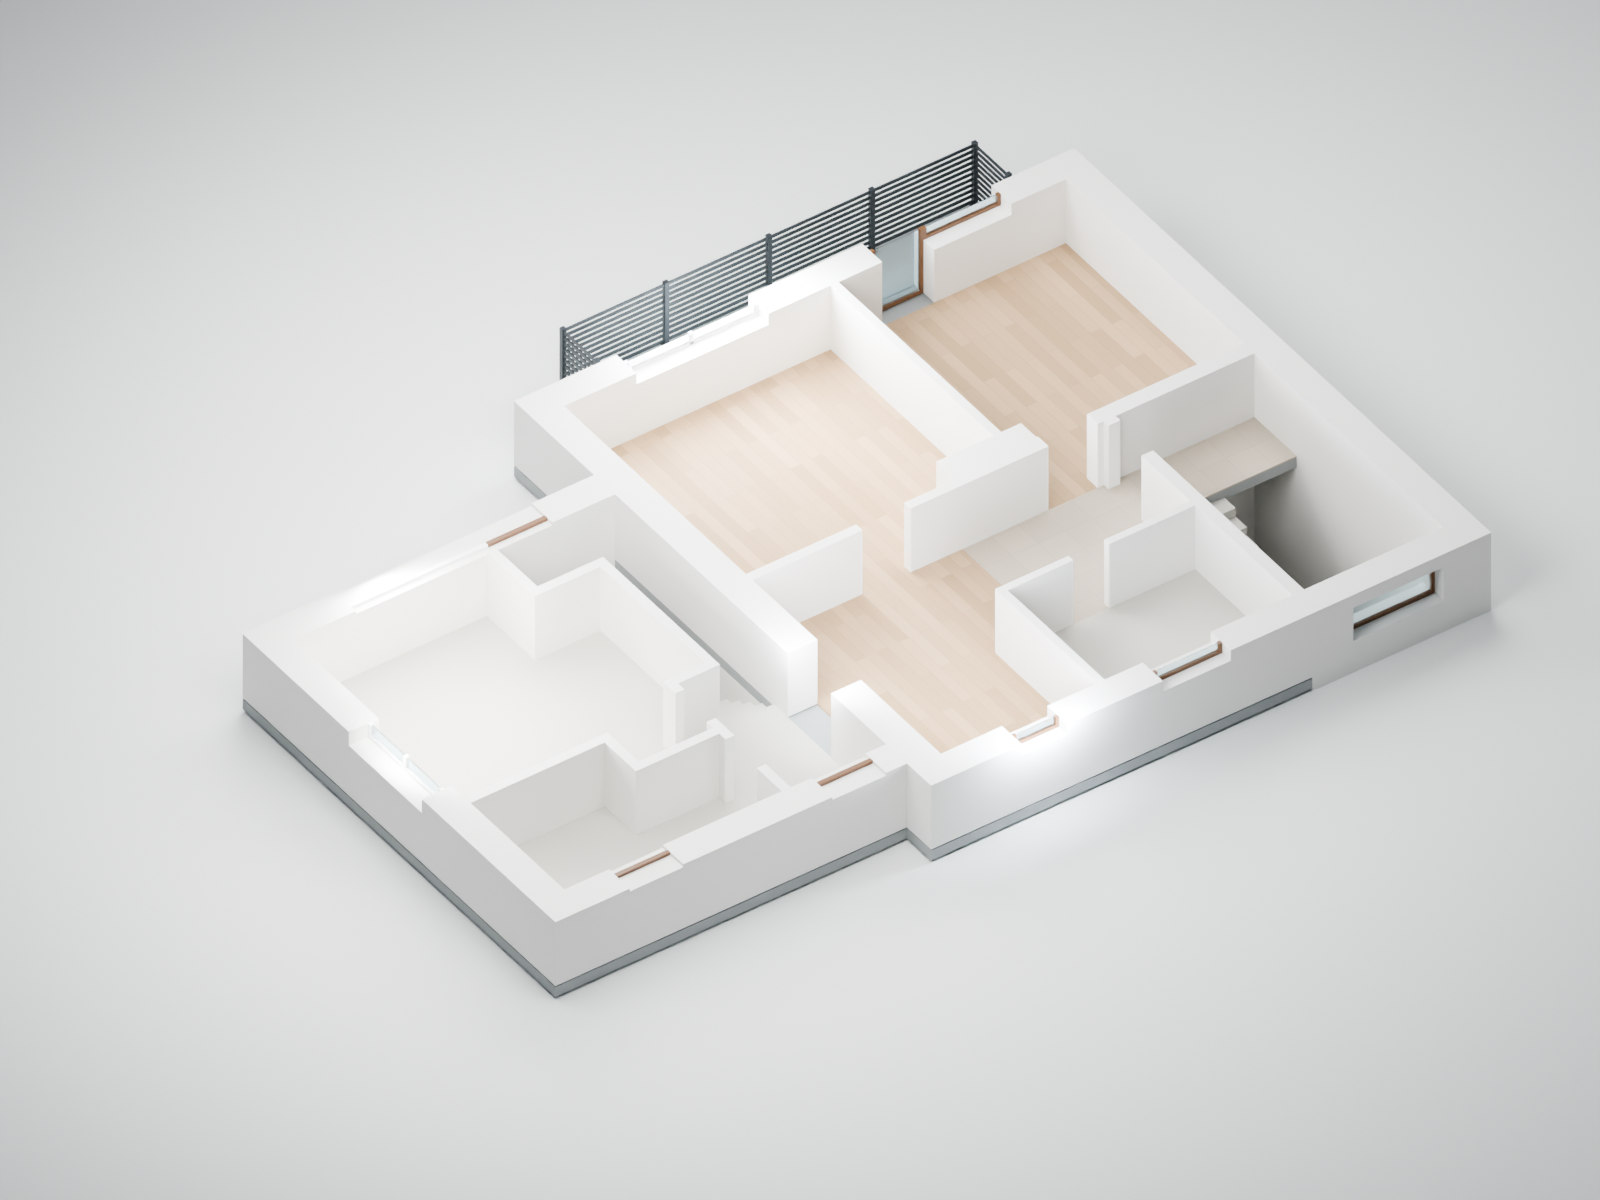
I gave GPT-6 Astra drawings and measurements of our house and asked it to build a 3D model. Over the following sessions, we furnished rooms, tried different beds, redesigned a bathroom and calculated materials. I could describe a change, inspect it from another angle and keep working with the same editable house.
This is one of the biggest practical steps forward I have seen with this model. Astra could work through a substantial modelling task in professional software while I directed the result in ordinary language. The work took only a few hours, enough to change my sense of what was worth attempting with AI.
I chose our house because I could walk into any room with a tape measure and check each dimension against the real thing. I also had real decisions to make. It became a useful demonstration of what this capability can do today. The method is also something you can reuse: give the AI a model of the thing you are working on, then use that shared reference to explore, check and improve it.
An editable model you can keep working on
The first step is to build an editable base in Blender, a 3D modelling application. For a room, that means the walls, openings and dimensions. Once that base is checked, you can furnish it, save alternative layouts and produce plans or material calculations from the same geometry.
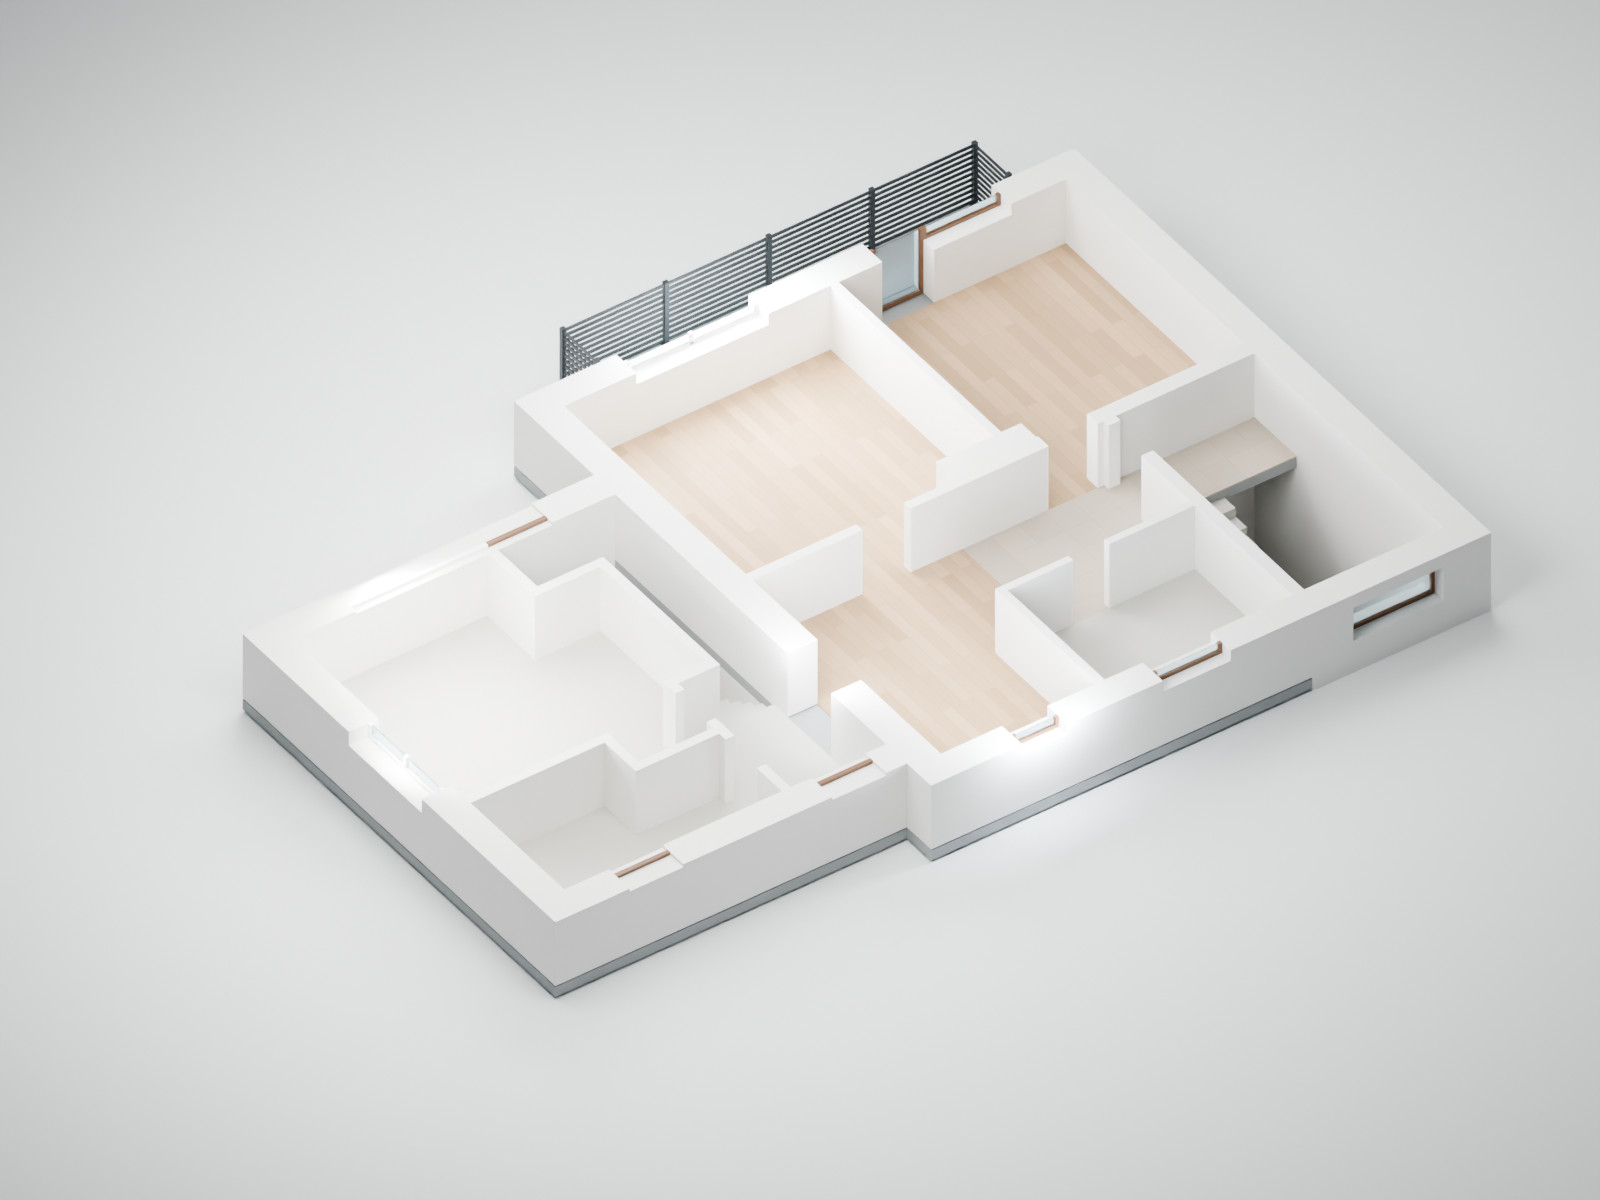
The model stores measured dimensions down to the millimetre. From that geometry, you can immediately calculate surface areas, check a product's fit and measure the clearance left when a drawer opens. Change the furniture and calculate again using the same room dimensions. Keeping assumed dimensions labelled makes it clear what still needs checking with a tape measure.
Each modelled room can be rendered from multiple viewpoints, with different colours, materials or layout variants. You can compare alternatives side by side, return to an earlier version or inspect the same arrangement from another angle. You can also use those views as the basis for AI photographic interpretations, while keeping the editable model as the reference for dimensions.
What makes Astra's 3D work worth paying attention to
The capability spans several kinds of work. Astra interpreted the references, wrote modelling code, ran Blender, inspected rendered views and revised the scene after feedback. It could then help connect the geometry to product information and calculations. I could stay involved at the level of the room and the decision, without manually carrying out every modelling operation.
OpenAI's architectural visualization with Astra demonstrates a similar workflow: an editable Blender house, refinement through preview renders and a later walkthrough in Unreal Engine 5. Its model guidance also describes improved coherence over long tasks compared with GPT-5.6 Sol and earlier models. My house project put that broader capability to work against existing rooms and measured constraints.
My assessment comes from using Astra for this project, rather than a matched test against an older model. Blender scripting already existed; the leap I am describing is how much of a useful 3D workflow I could now direct through conversation.
The rest of this article follows the work closely enough to try the approach yourself. Start with something you can check, build a dependable base and give each revision a specific question to answer.
Start with references the model can be checked against
Give the agent drawings, photographs and measurements that describe the same space. Explain which features already exist and which are proposed changes. An older plan may contain a wall that has since been removed; a photograph may show furniture you want to replace. That context helps the agent build the right starting point.
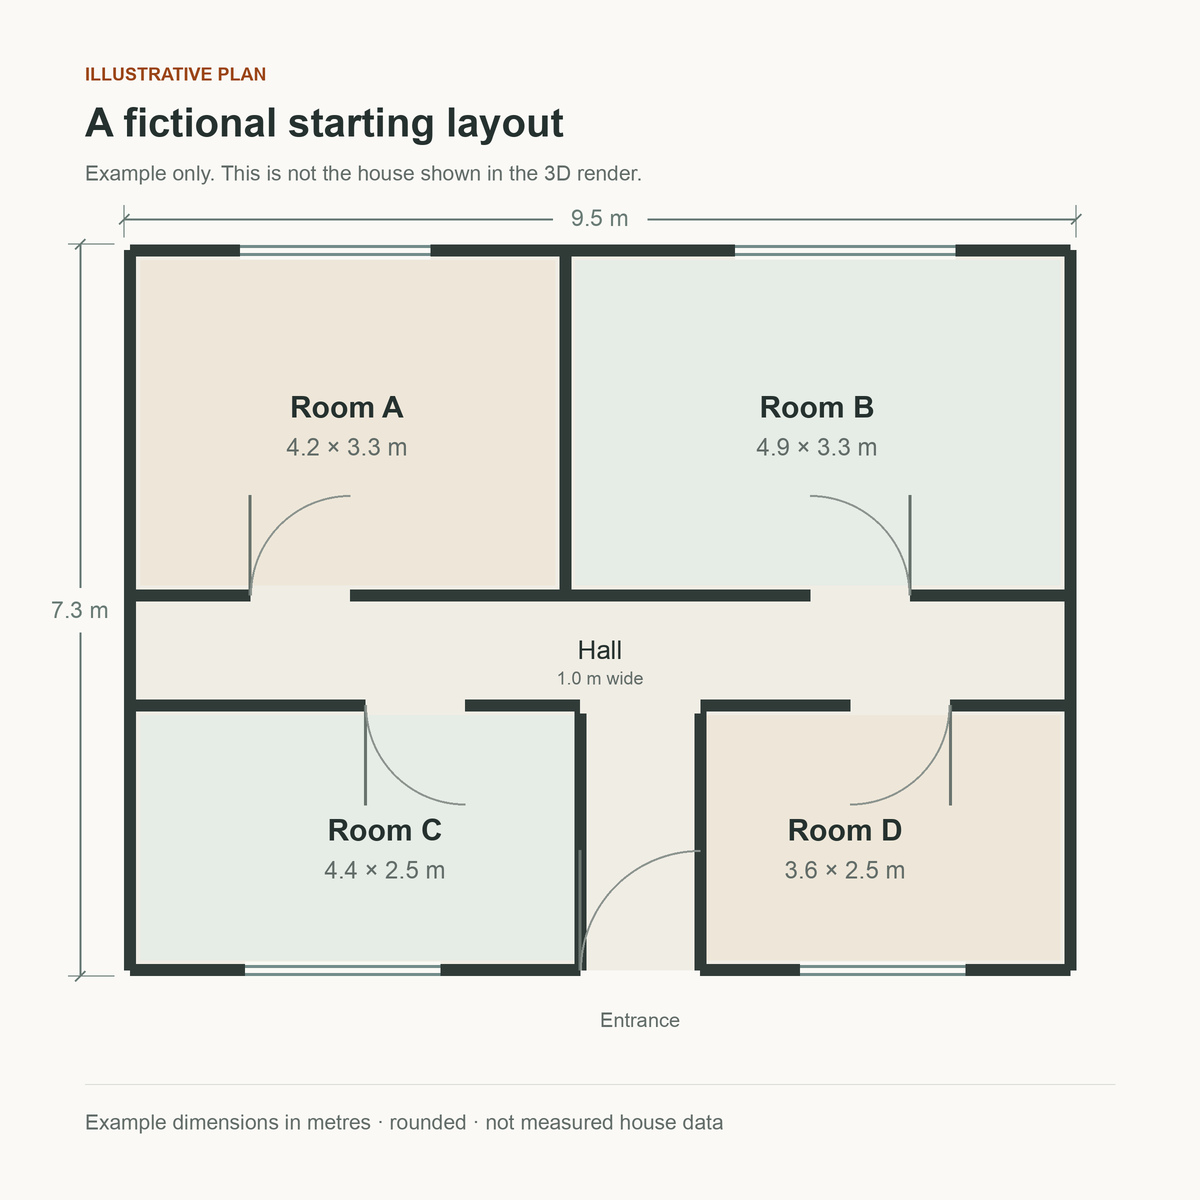
Make the measurement endpoints clear. In our project, two measurements ended at the face of a chimney, and I had to explain exactly where I had measured to. The numbers alone did not settle where the walls belonged. A marked photograph or sketch can make that explanation much easier.
Ask the agent to flag conflicting measurements and missing dimensions. Some of our overlapping readings required reconciliation, so matching the model to the inputs was itself part of the work. Keep a record of those decisions: a detailed-looking room can still contain an assumed ceiling height, and you want to know that before using it to check a tall cabinet.
Give the agent an editable scene and a revision loop
I used GPT-6 Astra in Codex, with access to the project files and a local Blender installation. Astra wrote and ran Python scripts that created and changed the scene. Blender's Python API and modelling tools supplied the operations; Astra worked out how to use them for the request.
To try this, put the plans, photographs and measurements in a project folder the agent can read. Ask it to build and save an editable Blender file, alongside the scripts it uses. A rendered image alone will not give the next session the objects and dimensions it needs to continue the work.
A starting instruction could look like this. It is an example based on the workflow, rather than a transcript of my original prompt:
Use these plans, photographs and measurements to build an editable model of the empty rooms in Blender. Use metres consistently. Record missing or conflicting dimensions as assumptions. Save the model and modelling scripts, and render an overhead plan plus views where I can check the doors, windows and room connections. We will validate the empty layout before adding furniture.
Once the base was usable, the loop was simple: I described a change using the room and objects we knew, Astra changed the relevant model, and we inspected the result against the dimensions and intended use. If it misunderstood the room, I corrected it. The saved files let us continue that work in later sessions.
We also added checks for things that should survive a revision. Changing furniture should leave the walls and openings intact. Other checks compared object dimensions, looked for overlaps and tested the space occupied by selected cabinet doors when open. A render can make a problem obvious, while a numerical check can catch something too small or obscured to notice in the view.
I brought experience in software and checking automated work to this process. I still had to judge the result, and physical questions such as wall fixings remained for the relevant professional. But I could exercise much more of Blender's functionality while learning what the project needed, rather than mastering the application before starting.
Use furniture variants to test a real question
A useful variant answers a question: does a product fit, can its doors open, or does a different layout leave more usable space? Ask the agent to create separate versions and show them from the same viewpoints. That makes the effect of a change easier to compare.
Use the product's outside dimensions, including any steps, handles or moving parts. In our bunk-bed example, the manufacturer's frame dimensions were larger than the mattresses, and the stairs occupied additional floor space. We then modelled the guest bed both open and closed, keeping its unconfirmed pull-out dimensions labelled as provisional.
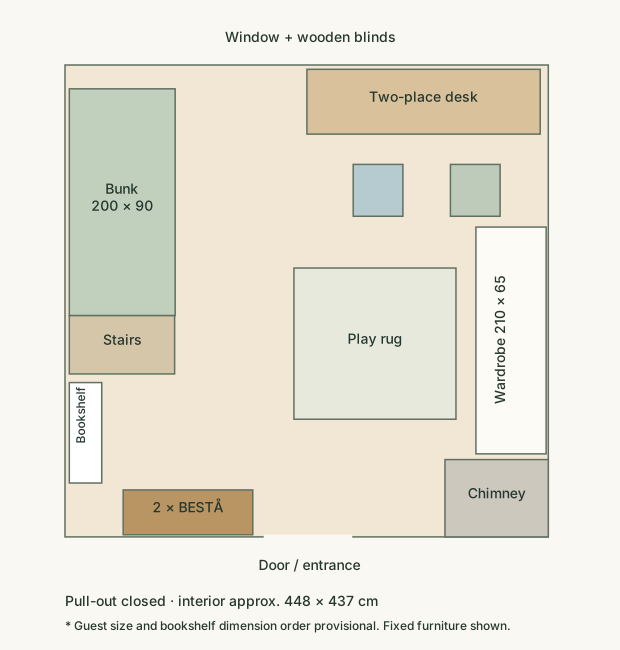
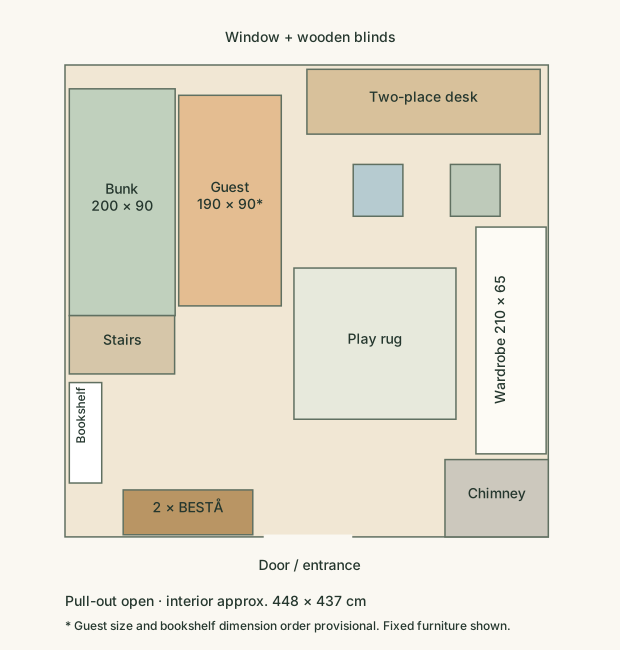
Opening the guest bed left only about 24 cm beside the desk in the study. That was a useful discovery before ordering: the bed could occupy the room, but that gap could not serve as a passage. The same approach works for cupboard doors, sliding panels or equipment that needs space around it when used.
Colour and material variants answer a different question. Keep the layout fixed while comparing finishes, so a change in camera angle or furniture position does not distract from the choice you are trying to make.
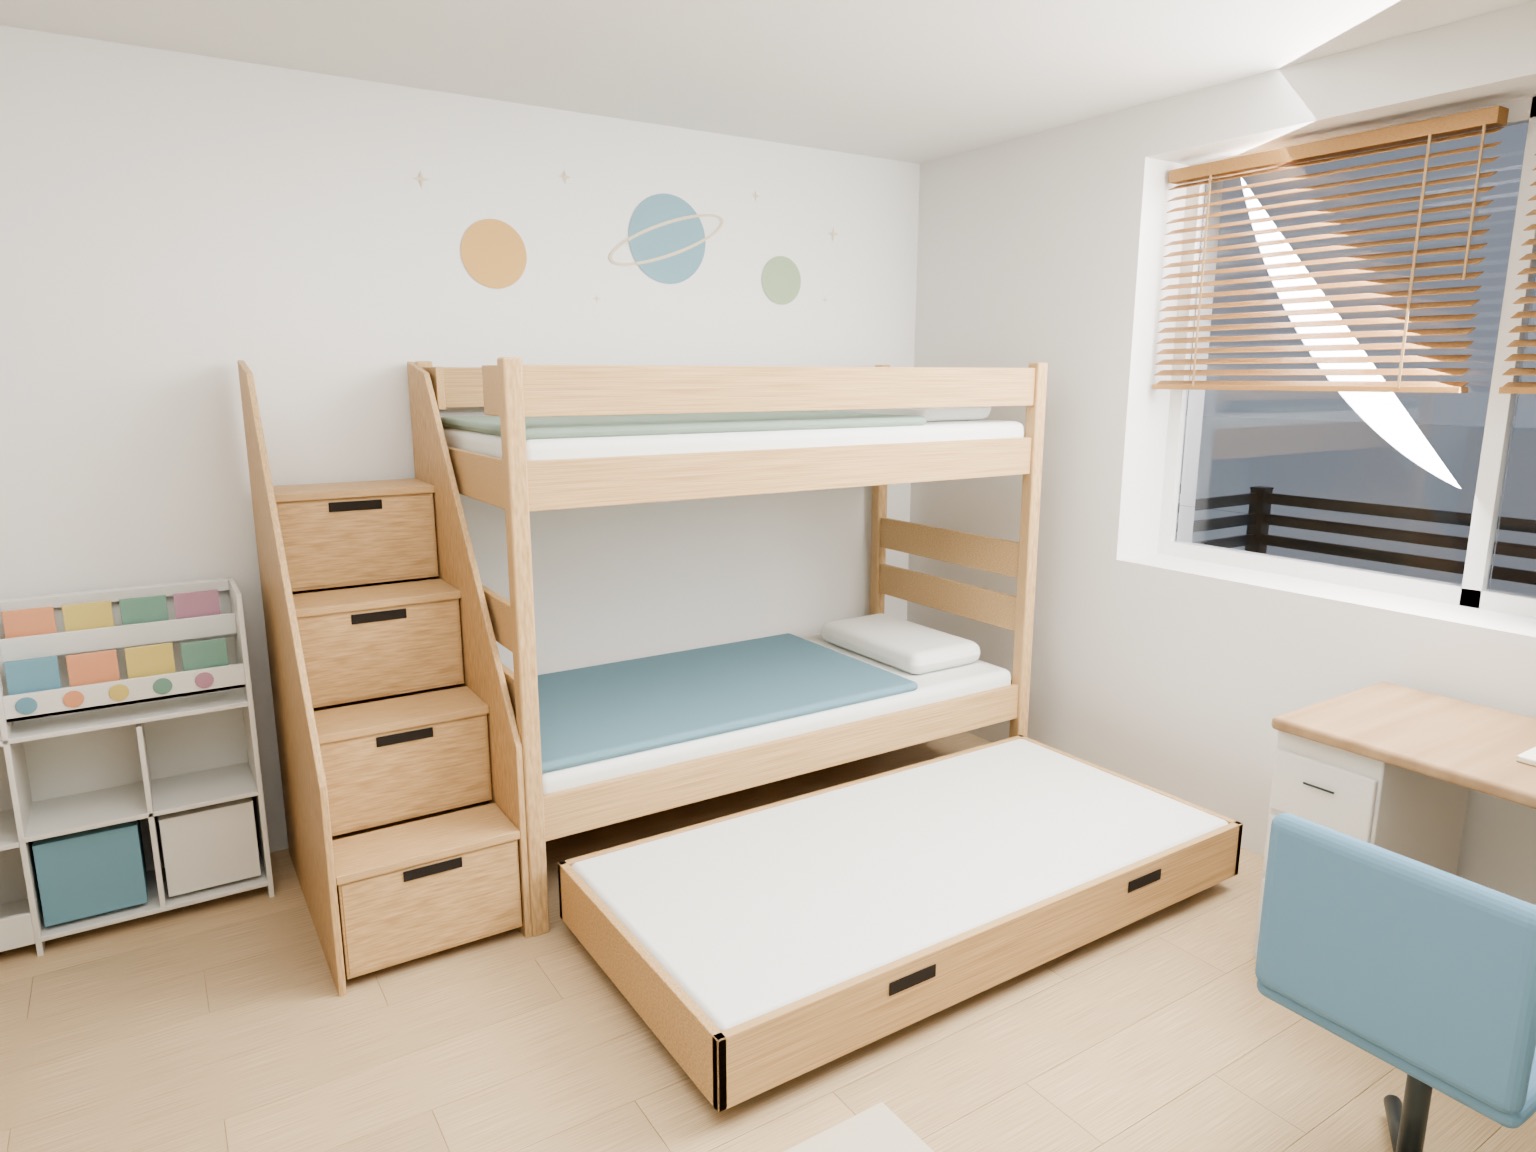
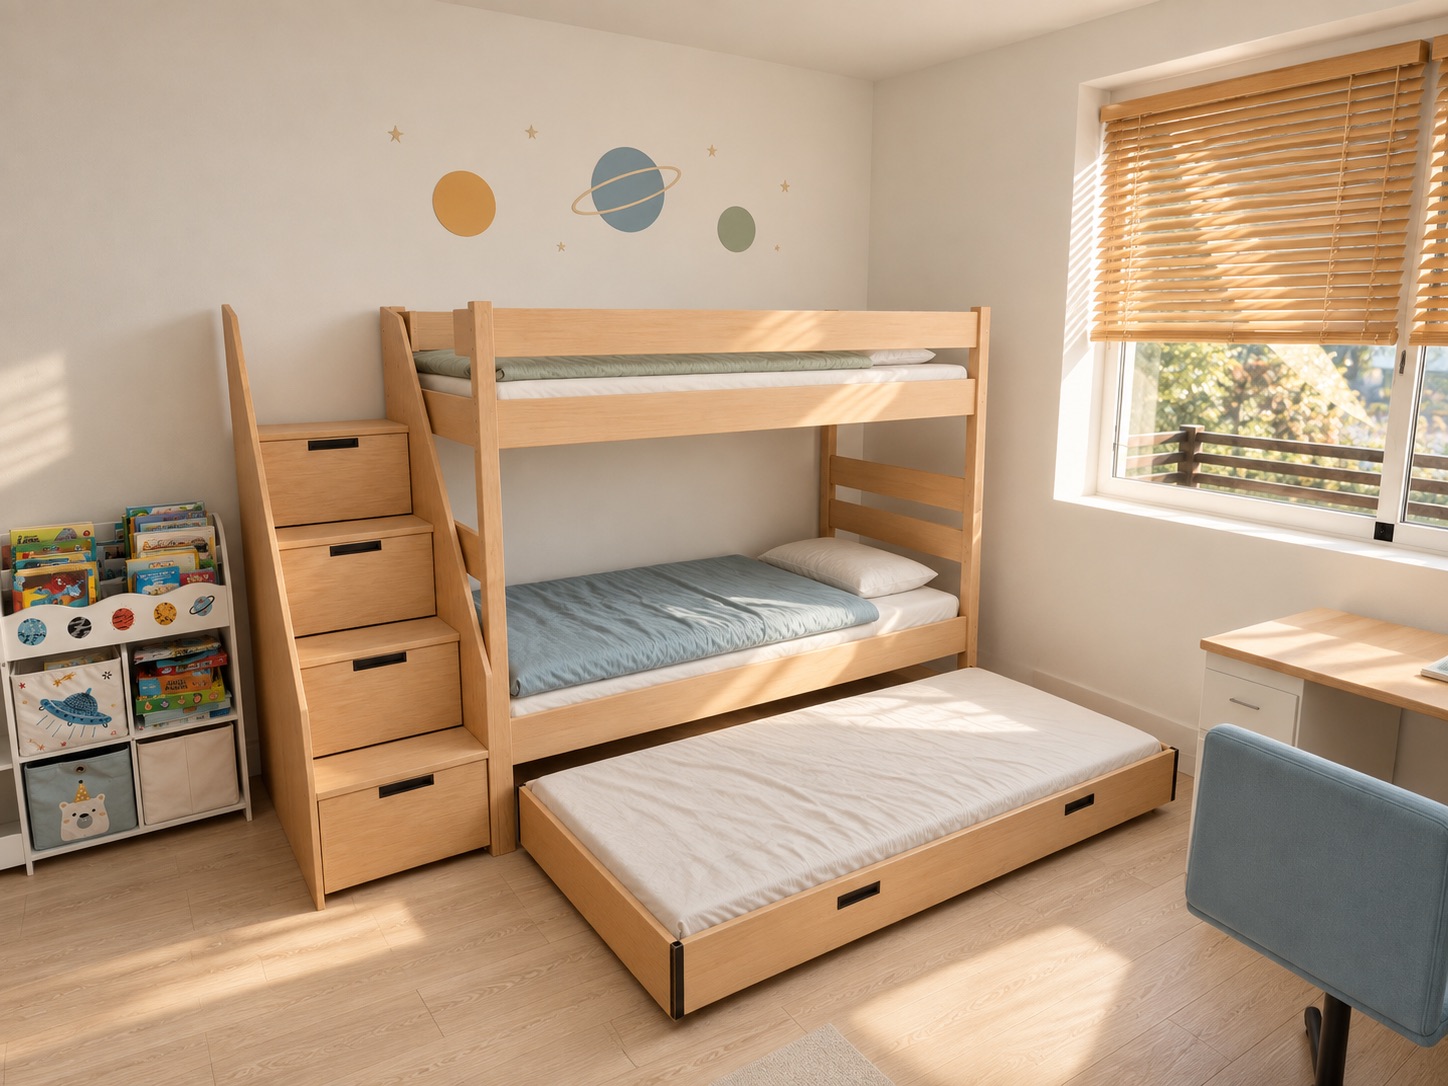
You can take the model's renders into image generation to explore lighting, fabrics and atmosphere. In this project, that was a separate step from Astra's work on the editable scene. The resulting images help communicate an idea, but small details can shift during generation. Return to the Blender geometry for dimensions and fit.
Keep awkward constraints in the model
Existing furniture and equipment often make a layout difficult. Give the agent their actual shape and dimensions, and state what must stay. Otherwise, it may produce an attractive arrangement by simplifying away the constraint you needed it to solve.
Our office combined an existing L-shaped desk with an indoor cycling setup and space for exercise. Keeping the real desk shape in the model let us compare arrangements around something we already owned.
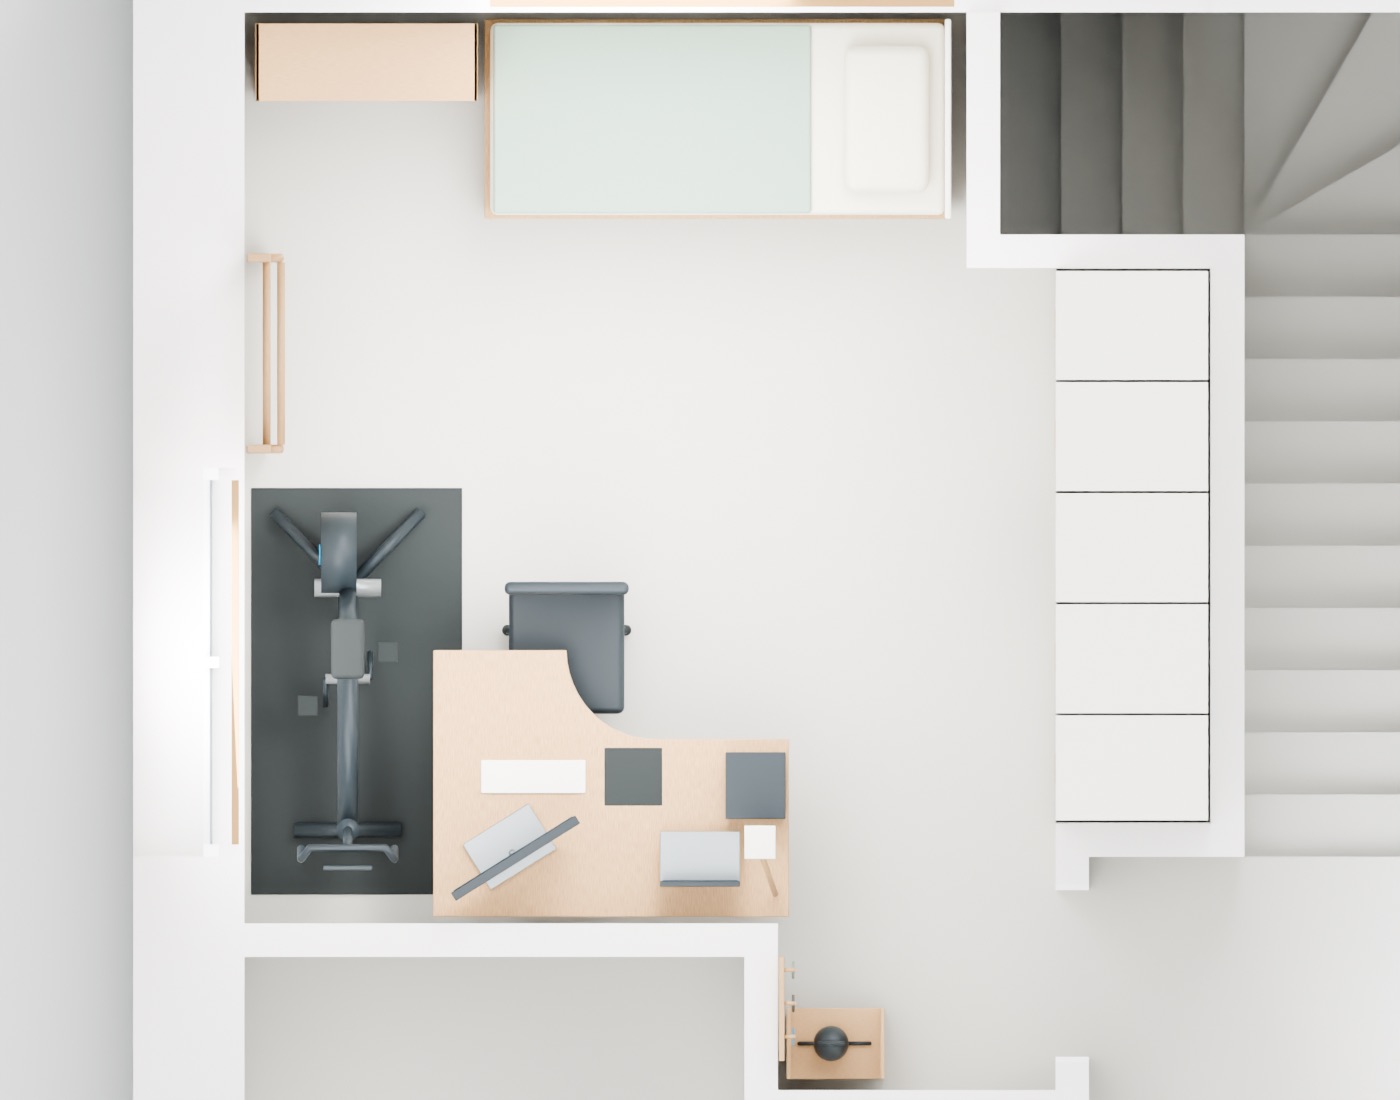
Ask for the usable space as well as the occupied space. An overhead view can show circulation routes and areas that serve more than one purpose. In our layout, the exercise and circulation areas overlapped; adding their areas together would have exaggerated the available floor.
A model can make the compromise visible, while you decide whether it is acceptable. I chose to retain the deeper desk despite tighter access around the trainer. For moving equipment or people, follow the geometric check with a practical check of the movement involved.
Connect the geometry to quantities and product information
Once the geometry is available, you can ask the agent to turn it into a materials calculation. Define the scope first: which rooms, surfaces or sections are included? Then provide the relevant product information, such as coverage per pack and the allowance for cutting.
Flooring makes the difference between measured area and purchased quantity easy to see. In our example, approximately 32.57 m² became 19 packs covering 36.176 m² after the cutting allowance and rounding each room to whole packs.
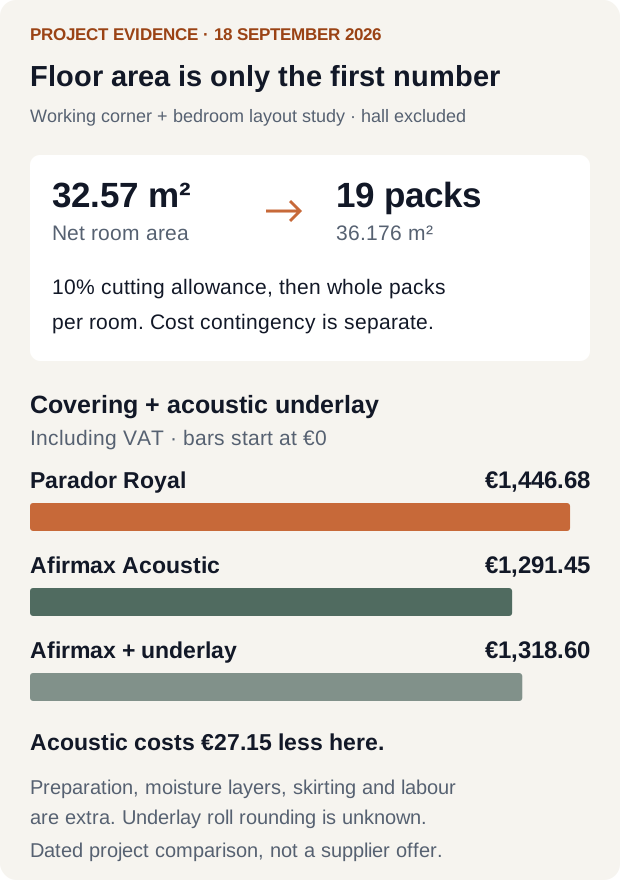
You can also compare complete combinations of products and find a supplier who can deliver them. Our comparison found that a floor with an integrated acoustic pad came to €27.15 less than the cheaper-looking floor plus separate underlay. The agent also identified the lowest-priced dealer among those compared with enough stock available for immediate dispatch at the time of the search. That connected the model's quantities to a practical purchasing option, including price and availability.
Ask for a calculation you can follow from the modelled area to the purchasing list, with sources and assumptions attached. When you change the product or layout, the agent can use that record to recalculate the affected quantities. Keep unpriced preparation or installation work visible, and have the supplier confirm compatibility. The model supplies the geometry; the product documentation and site conditions supply other parts of the decision.
Turn a design variant into a parts calculation
For designs made from repeated parts, you can compare appearance and material use together. Change the spacing or arrangement, render the alternative, then ask the agent to recalculate the pieces and purchased stock.
We used a balcony railing to try this. Each variant combined a rendered view with a parts calculation priced from supplier listings, so we could compare exactly what the materials would cost and how the result would look. Changing the profile widths, gaps or post arrangement changed both the appearance and the cutting plan. That made it a practical optimisation exercise: we could weigh the price and material waste against the design we preferred.
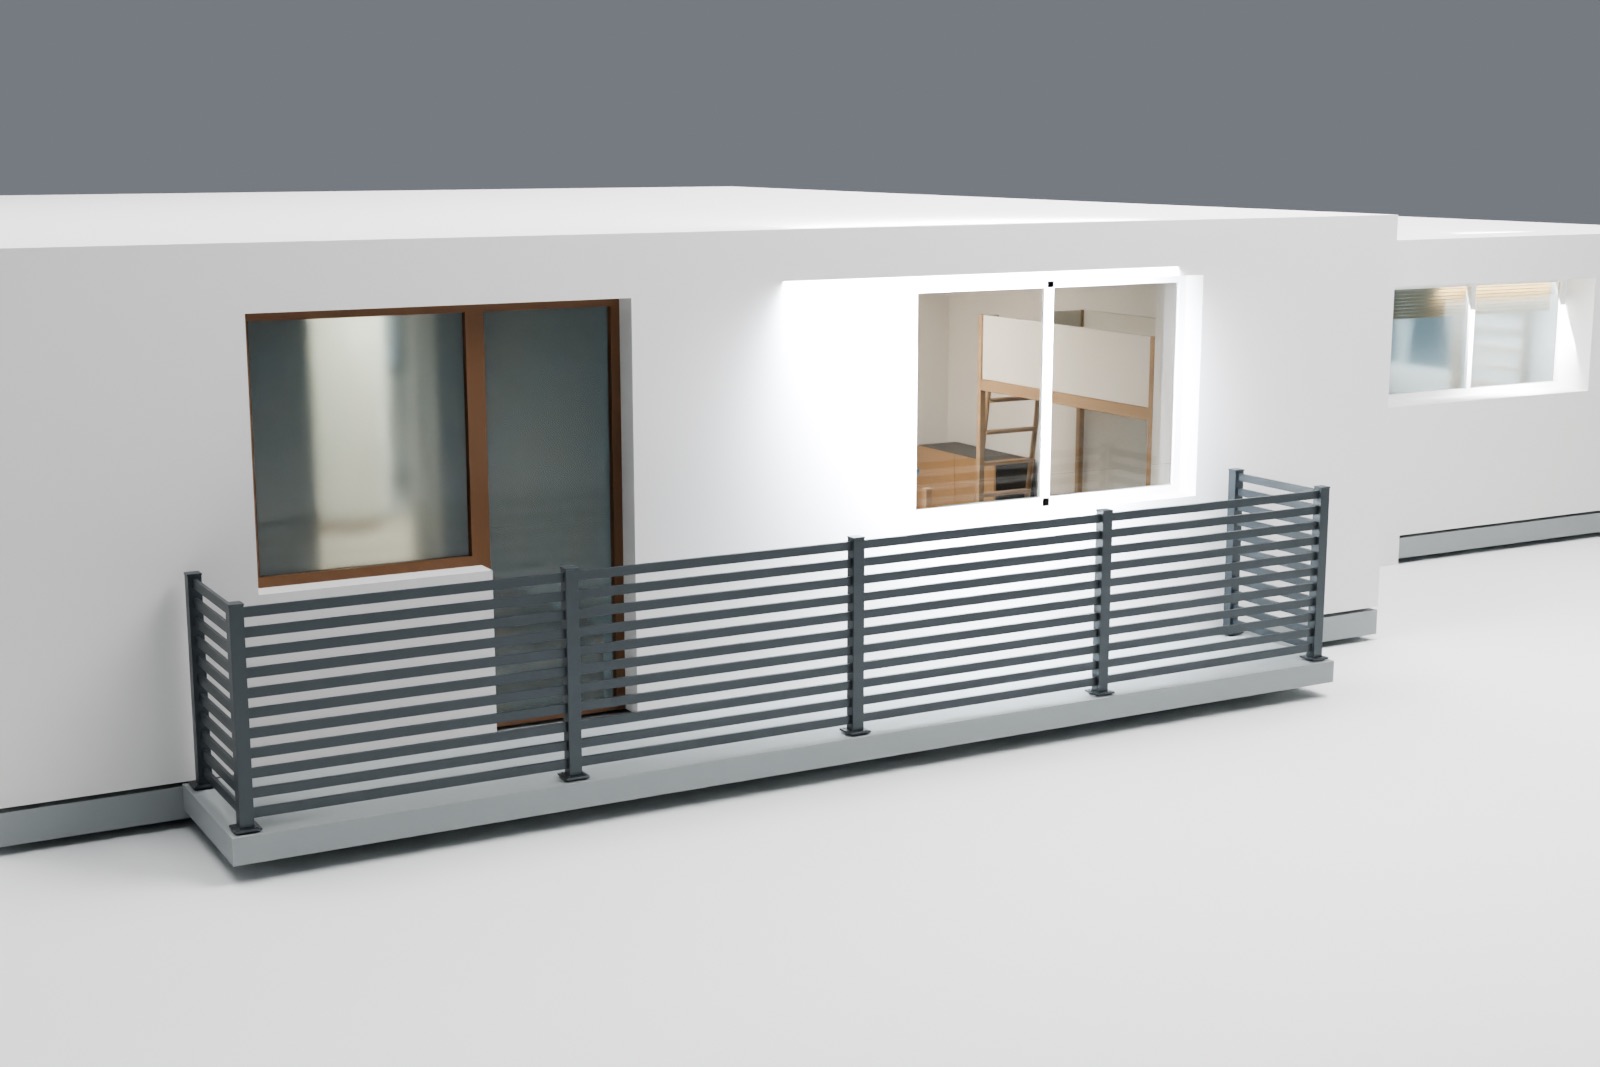
The selected study needed 66 installed pieces from 55 purchased bars because shorter pieces could share a bar. Another post arrangement reduced the bar count, but the extra accessories left only a small saving before installation. Looking at the model and calculation together made that trade-off easy to assess.
The same method could help explore shelving or other repeated assemblies: save the alternative, count its parts and compare the complete result. A parts calculation still leaves structural suitability and fixings to be checked by the relevant professional; the railing model recorded a design proposal, not an approved installation.
Refine details across several views of the same room
A saved 3D scene lets you inspect a design from any useful angle. Ask for an overhead plan, views towards each wall and close-ups where objects meet. Each view comes from the same geometry, so you can find problems that a flattering camera angle would hide.
Our bathroom study used this to compare layouts, fit a vanity between adjoining surfaces and review storage behind the door. As details changed, we could inspect them in the context of the rest of the room.
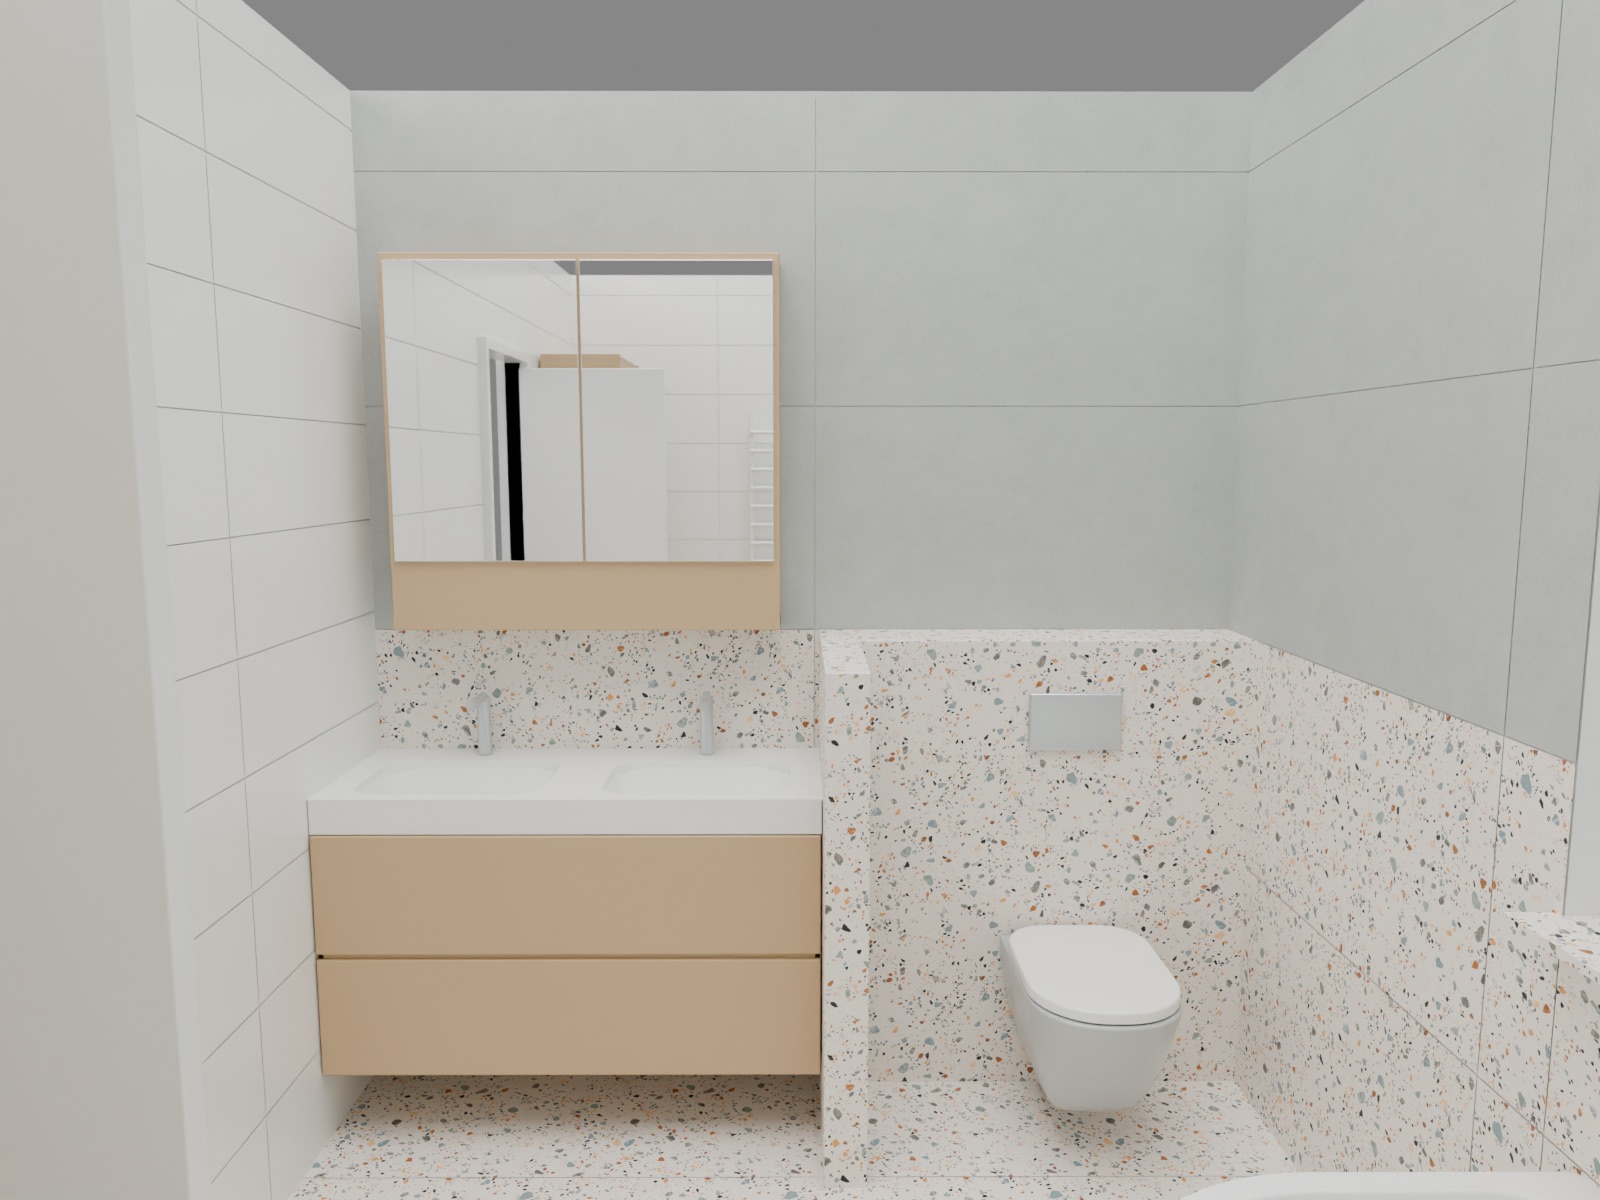
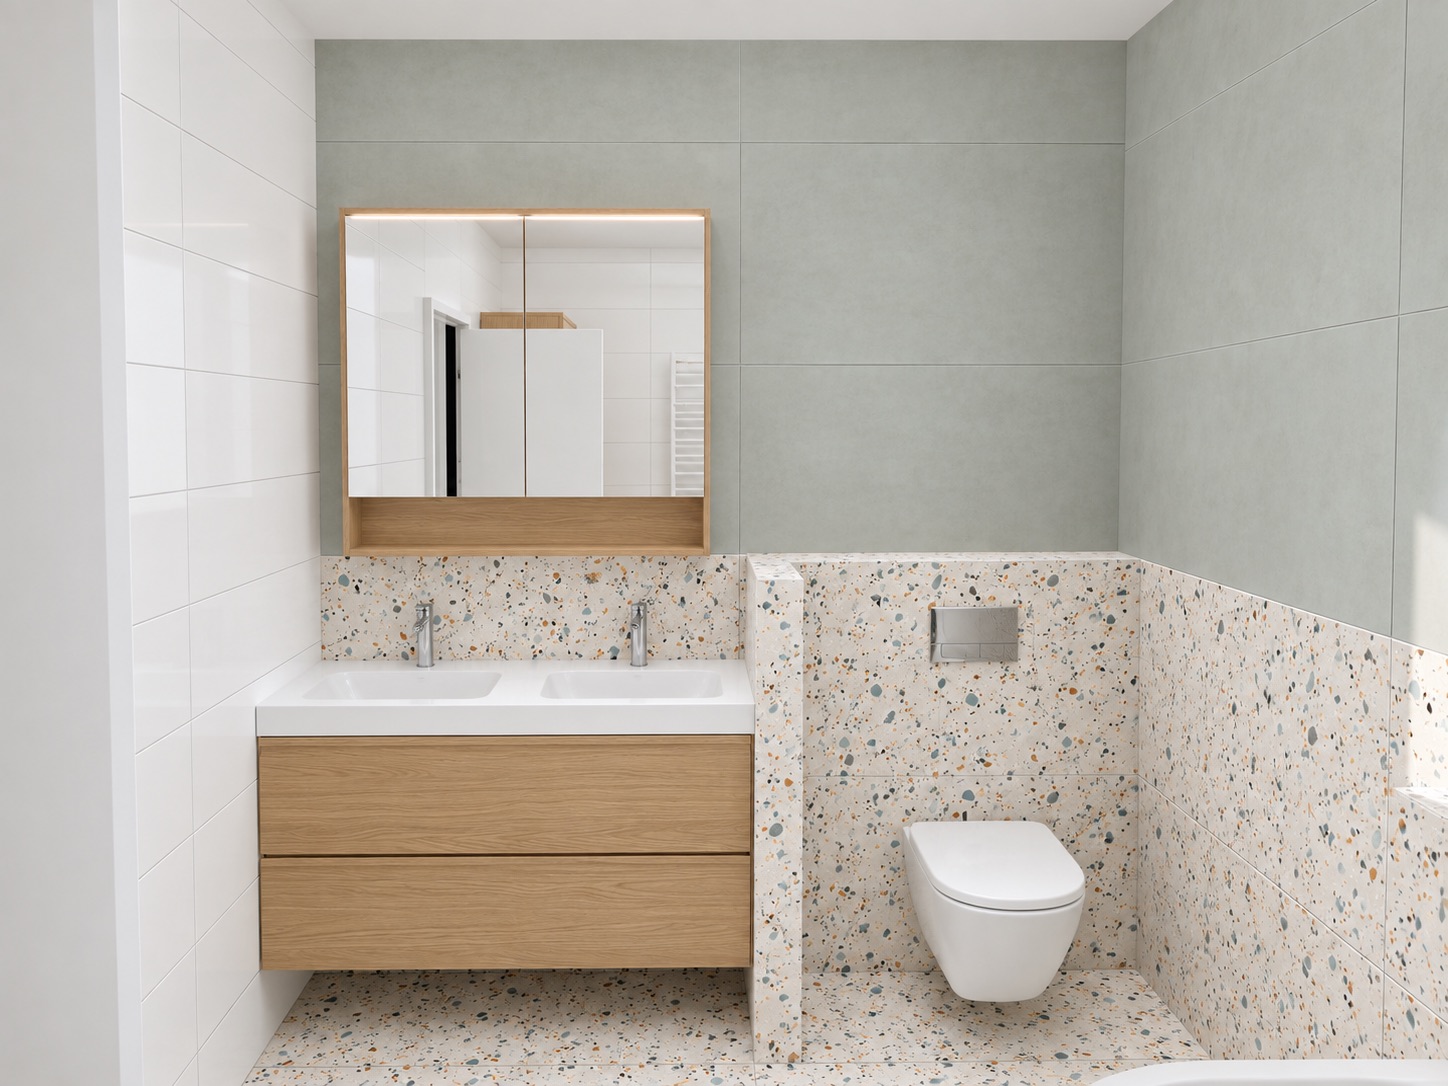
Keep actual product proportions when refining the scene. A mirror cabinet narrower than the vanity should remain narrower in the model. Tile courses should continue deliberately around a corner. Those details give the agent specific things to correct and give you a result you can compare across views.
Existing services are another constraint to carry through revisions. Photographs can help locate approximate plumbing zones, while hidden pipe positions may still need inspection. Record the difference so the model remains useful when you hand the proposal to someone who will install it.
Save a useful handover alongside the model
The same project can produce several outputs for different people: an editable scene for continued work, rendered views for discussion, a dimensioned plan or a materials list. Ask for the output that helps the next person make a decision.
For a supplier, that might be a dated plan, a few relevant views and quantities with open questions attached. For someone continuing the modelling, keep the Blender file, scripts and source references together. They should be able to identify the chosen version and distinguish it from the alternatives.
Our house project has not produced a verified savings figure. Its useful output so far is a proposal that can be inspected and corrected before an order. The broader benefit is being able to carry the same information from an initial idea into a working document without starting again at each step.
How I would repeat this on another project
Start with a bounded job you understand well enough to assess. A room with existing furniture is a good candidate because you can compare the result with the physical space. A shop display, workshop layout or exhibition stand could be another. Those are possible applications of the method; the house is the one I tested.
The sequence I would reuse is:
- Gather the source material, state the units and explain which details describe the current situation and which are proposed changes.
- Build a simple editable base and check it before asking for detailed furniture, materials or lighting.
- Save alternatives separately and give each one a question to answer, such as whether a drawer opens or equipment remains accessible.
- Review both the dimensions and several rendered views. Correct the model, then generate any appearance studies from that version.
- Carry the chosen version into a plan, quantities or other working document, keeping assumptions attached to the result.
For a follow-up, an instruction like this gives the agent a useful target:
Keep the room geometry and existing desk unchanged. Create separate versions with the guest bed open and closed. Show both from above and from the doorway, calculate the remaining clearances and identify any dimensions you had to assume. Keep the previous version so we can compare them.
The benefit of a 3D model is that the AI has a structured reference to work with. Once a room and its objects exist, you can ask about their relationships, try a change and inspect its consequences. That makes the quality of the saved model matter well beyond the first image.
A new model release can change which work is worth attempting
This experiment changed my expectations of AI in a part of work I would not normally associate with a coding assistant. A request about our house led to editable geometry, product-based furniture studies and material calculations. The same assistant could help move between those tasks while I supplied context and made decisions.
That reach matters to professional work. Early layout exploration, visual communication and preliminary quantity preparation are all activities people spend time on today. Making parts of them easier changes what a customer can prepare alone and what a professional can attempt within a given budget. It also raises the question of where specialist effort is most useful once the first version is easier to produce.
I expect more categories of work to be affected as models improve at using the software those professions already rely on. The house does not prove that a model can take over an architect's or installer's job. It shows how several tasks around those jobs can become accessible through the same conversation. Businesses should be examining those tasks now, while they can choose how to incorporate the capability.
An assessment of AI made a few weeks ago can already be too narrow. Each major release is a reason to revisit something you previously dismissed as impractical, especially when the obstacle was getting several tools and steps to work together. The useful question is what the current model can complete on your actual material, and how much effort it takes you to direct and check the result.
This is part of my work as a Technical Operating Partner: helping a business decide which new capabilities deserve a practical trial, shaping the workflow and checking the result against the business need. That can lead to controlled automation or a change in an existing software project. Sometimes the useful outcome is a clear reason to wait. The decision should come from trying the relevant work with current technology.
For Astra, I chose our house because I could put the result to use and check it myself. If your last serious trial of AI left you thinking it could not handle your work, try a specific part of that work again with a current model. Keep the result so you can compare it at the next major release. That is how you notice when a capability has become useful in your profession, while there is still time to decide what to do with it.